Information on Zoom meeting security and ways to manage Zoom interruptions are on the GW Information Technology Website.
This document provides security options to consider when scheduling a Zoom meeting and guidance if Zoom abuse occurs during your meeting:
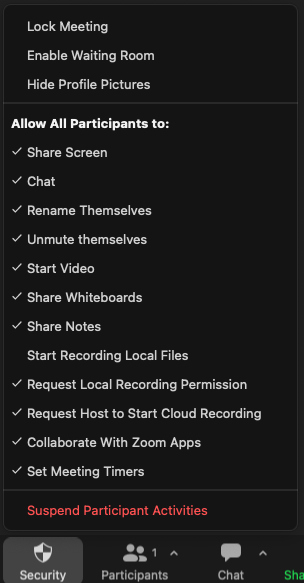
Here is a look at Zoom's in-meeting security options.
GW Law faculty can use a GW Law Zoom account to deliver lectures. Your GW Law Zoom account uses your GW Law Google account for authentication. Please follow these instructions to activate your GW Law Zoom account.
There are several ways to access your GW Law Zoom account.
through your Canvas course site [scheduling and starting lectures]
through the GW Law Google apps 9 dot menu [to access the settings dashboard]
All lectures related to a GW Law course should be scheduled using the Canvas Zoom integration in order for the Zoom link to be automatically made available to all students within the course. Meetings scheduled outside this portal will not be automatically made available for all students in your course.
Log in to Canvas, either using the nine-dot Google Apps menu or at my.law.gwu.edu.
Select the course you want to schedule meetings for from your Canvas course site.
Click Zoom in the left course navigation menu.
In the top right corner click Schedule a New Meeting
Fill out the form using the following guidelines
Topic: Your course name is auto-populated here. Do not delete the title but you may add on text (Ex: 9999-10 Web Portal Law Week 1 Lecture 1). The Media Center uses your Course and Section Number (9999-10) to accurately permission academic recordings for students to view.
When: The start time as defined by the schedule of classes for the first course meeting. You can edit the start time down to the minute by clicking on the box and manually typing in the time. Ex: 2:05 PM
Duration: The length of time your lecture is scheduled to last according to the schedule of classes.
Recurring Meeting: Check this box if you are scheduling for the entire semester.
Recurrence: Select Weekly
Occurs On: Choose the days of the week you would like this meeting to recur on
End Date: The last day of the class/semester in the Law School
Registration: Do not check
Security: We do not recommend changing the password, it is unnecessary for meetings scheduled through @law Zoom.
Waiting Room: For course meetings, we do not recommend using the waiting room. Leaving this box unchecked will allow attendees into the meeting automatically without requiring any action on part of the host.
Meeting Options: We do not recommend changing these options. If you do not want a meeting to automatically be recorded, you may uncheck Record the meeting automatically in the cloud
Alternate Hosts: If you have a teaching assistant or other user you would like to assist with managing you meeting, enter their @law email address here to give them host permissions. Click into the Advanced Options to add the Alternate Hosts.
Select Save to save your meeting. Students registered for your course can now access this meeting by using the Zoom integration on the Canvas course site.
For additional assurance, share the link with students registered for your course by using the instructions in the next section.

On the following page, you will see all the details of your meeting
Time: Shows the details of your meeting. If the meeting is recurring, you will see the option to See all Occurrences. Here you can delete meetings from specific days.
Add to Calendar: Optionally, you may add an event for this meeting to your personal Google Calendar, Outlook Calendar, or Yahoo Calendar. *If you get an error message, you may need to log in to your Zoom.com profile and authenticate your Calendar under Calendar and Contact Integration.
Invite Attendees: This is the direct link to share with outside attendees. You may also Copy Invitation for full instructions to send out. *If the meeting recurs, this link will not change for future meetings, proceed with caution when sending invitations to non-GW Law attendees.
Polls: Polls may be created in advance using the Add button at the bottom of this page.

Joining a test meeting is highly recommended to familiarize or refamiliarize yourself with Zoom. There are two options for testing a meeting:
Zoom offers a link to a Zoom meeting specifically for quickly testing things like your internet connection, mic, speakers, and video.
This link will mimic how it is to join any other meeting, so if this test is successful, your real meeting should also be successful, barring no major changes to your device(s) and external internet service. This meeting will end within 5 minutes and is really just used as a quick set up test.
If you want to take more time familiarizing yourself with Zoom set up, the in-meeting experience, and sharing your screen, you may start your scheduled Zoom meeting anytime and it will not affect the link. For example, if you have your Zoom scheduled for Tuesday the third, 3:50pm to 5:50pm, you can start that meeting any time before that Tuesday at 5:50pm and the link will remain available and functional to you and attendees until then, whether you start it days before or not.
We do recommend testing starting out your Zoom meeting ahead of time, especially if you are newer to Zoom or GW.Law Zoom for teaching. Just make sure that when you are done with testing your meeting, you click the End Meeting For All button so that the meeting is no longer running. That will affect the recording and any reports you may want to pull later.
The next section below will give you an example of what you'll see when you start your Zoom meeting and click around the menus and options.
You can access the dashboard for your Zoom account by logging into your GW Law email and using the nine dot Google Apps menu.
Schedule a New Meeting with this button.
Edit Settings for meetings scheduled in the future and create polls in advance of a meeting.
Use the Zoom Settings Dashboard to view your upcoming and previous meetings.
DO NOT schedule a class lecture from the Zoom Dashboard. Please schedule through the Canvas course site Zoom integration.
To edit settings, click on the link for the specific meeting under the Topic column in the meetings list. See sections herein for detailed instructions for specific settings.
You can also use the Zoom Dashboard to review settings for Meetings, Recordings, and Telephone. Many settings are configured at the institution level and not available at the account level.
Two types of reports are available.
Usage: View Meetings, Participants, and Meeting Minutes within a specified time range
Meetings: View registration reports and poll reports for meetings
All Zoom lectures, created using the Canvas integration, are set to automatically record. Once the lecture ends, it is sent to the Law School's media server and stored. Making the recordings available to the students is upon email request and is subject to processing times.
When you end your lecture, simply End the Meeting for all and your recording will be stopped.
If you stop the recording and need to restart it during the same lecture, click the Record button in the menu bar, then select Record to the Cloud.

| Button | Action | Description |
|---|---|---|
 |
Mute |
To disable/enable your microphone, click on this button. Upon entry to your lecture, all students are muted by default. Inform your students when you will allow them to unmute themselves. |
 |
Video | To disable/enable your webcam, click this button. |
 |
Security | Provides you information about the session encryption. |
 |
Participants | View the list of participants in your class session. |
 |
Chat | Send a message to one person (private chat) or to all participants |
 |
Share Screen | Share your desktop (everything you have open) or select a specific application to share (e.g., Microsoft Word) |
| Polls/Quizzes | Create Polls/Quizzes to use in your Zoom sessions. You can create them on the fly or before your class session from your Zoom Service Dashboard | |
 |
Recording | Use these buttons to either Pause or Stop your session recording. |
 |
Breakout Rooms | Create Breakout Rooms in the middle of your live session. |
 |
Reactions | Add non-verbal emoji reactions to the session. |
|
|
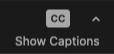
Show Captions | Allows the system or a participant to start providing live captioning. |
| Apps | Integrate apps (Zoom timer, virtual backgrounds) to use during your meeting. | |
| Whiteboards | Allows freeform collaboration and brainstorming space on a "whiteboard". | |
| Notes | Open Zoom's Notes feature to collaborate on meeting notes. |
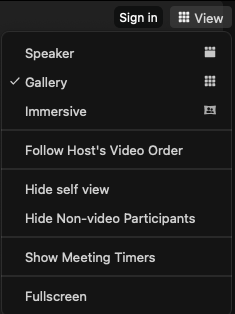
Each Zoom account can choose their personal view of the Zoom session. The view selector is at the top right of your screen.
Speaker View displays only the person speaking in the main display box. All other participants are displayed in the top panel.

Gallery View displays thumbnails of participants in a grid pattern. Depending on your computer, you can display up to 49 participants in a single screen. For meetings with more than 49 participants, there will be multiple gallery pages and scroll arrows to display those pages.

Co-hosts can be assigned in-meeting or in advance of a meeting. The screenshot below shows how to make a participant a co-host using the participants list in-meeting. To make someone a co-host in advance of a meeting, use the nine-dot Google Apps menu to login to Zoom, edit meeting details, and assign co-hosts using their @law.gwu.edu email. Images of this process are at the top of this guide under How to schedule a Zoom lecture.


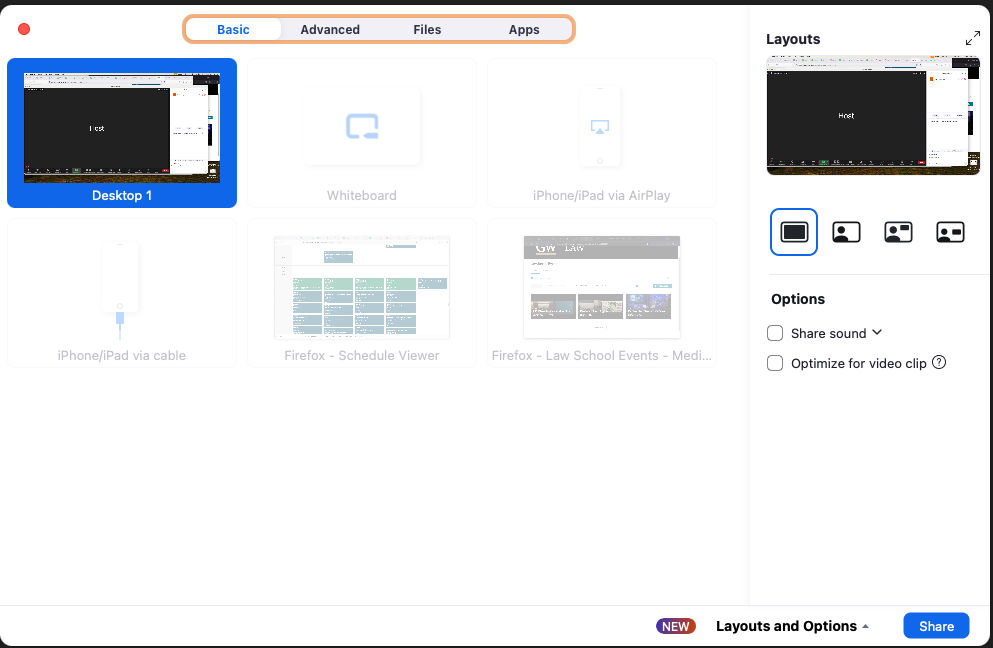
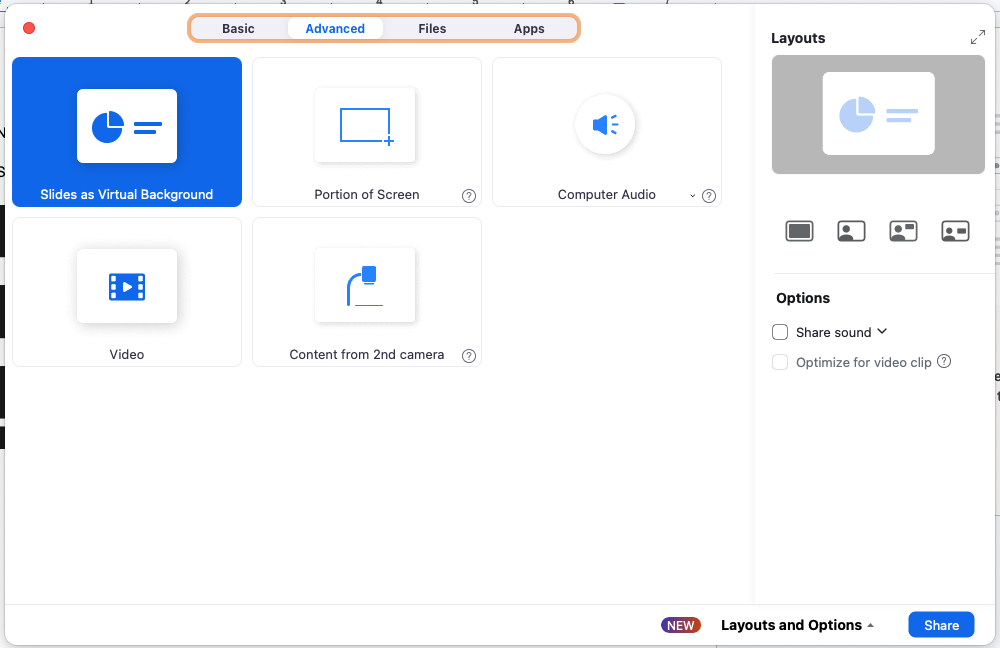
Zoom offers many screen sharing options and configurations.
Most often you would just share your entire desktop screen by choosing "Desktop 1" or one particular window open on your desktop, like a browser window (Firefox, Chrome, etc.).
If you plan to share screen to play a short video make sure to check the Options "Share Sound" and "Optimize for video clip".
Advanced options allow you to only share a portion of your screen, a video, just audio, and more.
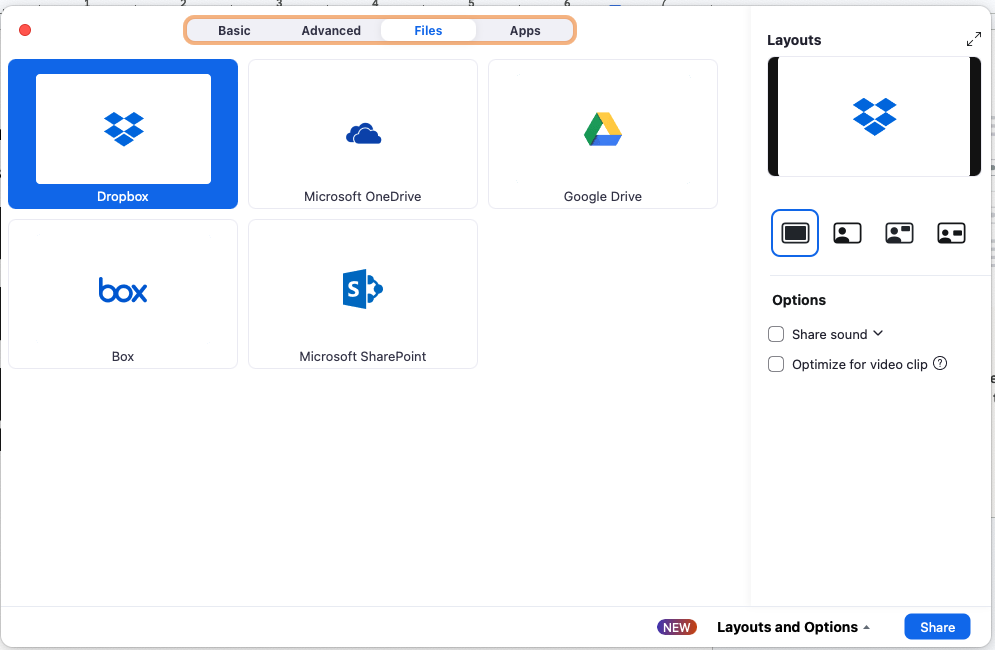
Files options allow you to share files directly from a third-party file sharing service.
For more detailed information on screen sharing, please see Zoom's guide here: Sharing your Screen or Desktop on Zoom
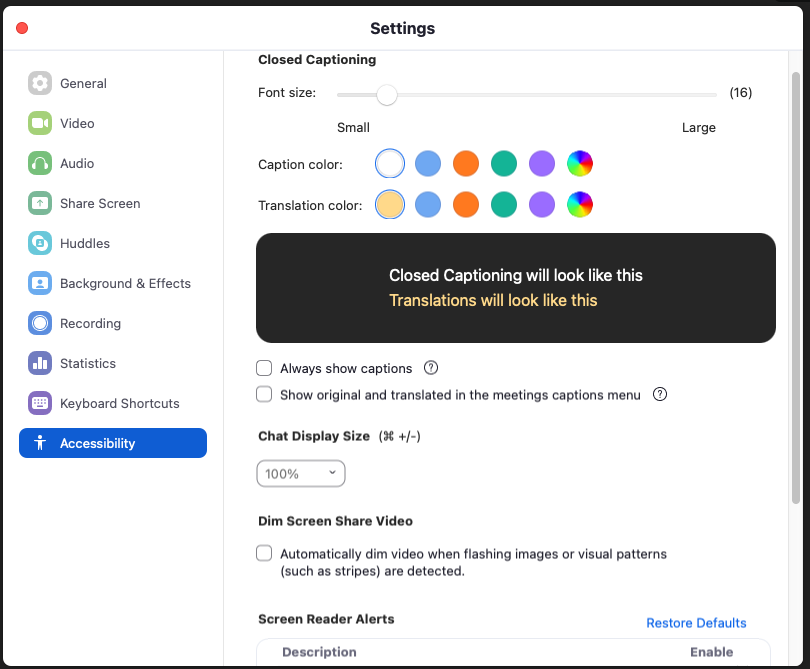
Zoom offers a Closed Captioning tool that provides live automated subtitles and transcription of the meeting audio. This feature allows you to make your meeting more accessible with ease.
1. Turn on Closed Captioning by clicking the Show Captions button in Zoom's lower toolbar.
2. Then choose the captions language. English will show first by default.
3. Click Save.
4. The Captions are now turned on. A brief notification will appear at the bottom of the Zoom.
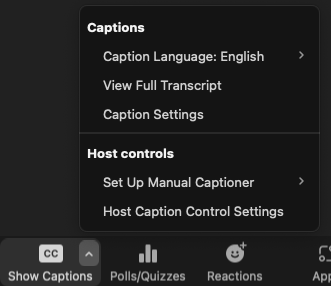
1. Click the Show Captions caret
2. Then Click Caption Settings.
3. Adjust Captions settings here in Zoom's Accessibility settings if necessary.
The use of pre-assigned breakout rooms requires that, during the meeting, the students are logged in to Zoom with their @law accounts.
To continue to pre-assign breakout rooms, click Edit this Meeting
Under Meeting Options, check the box marked Breakout Room pre-assign
Create Rooms allows you to manually create rooms here in Zoom, if you feel comfortable with CSVs you may click Import from CSV
To pre-assign breakout rooms you need each participants @law.gwu.edu email address
Click Save in the Breakout Room Assignment window if you create rooms manually
Click Save once more to make sure all changes are applied to the meeting.


Breakout rooms allow a host to place participants into smaller groups. This can be useful for small group discussion and activities. Breakout rooms are controlled and managed by the host.
The host can accomplish this using the breakout button on the toolbar. The host then defines how many rooms to create. The host can manually define which participants go into which room or allow Zoom to automatically place participants in rooms using a randomizer.

The host can accomplish this through the Zoom Settings Dashboard. This process is detailed at the top of this guide.
For more details about breakout rooms, view the Zoom Breakout documentation.
We recommend using Zoom to hold office hours to minimize the need for other tools. Please use the instructions above to schedule your office hours and change the referenced settings below. Office hours should be scheduled through Canvas to be accessible by all students.
By choosing to use Zoom for office hours, you have the ability for certain restrictions and options.
You can access the dashboard for your Zoom account by logging into your GW Law email and using the nine dot Google Apps menu. Once in your Zoom account, you can access transcripts by following the steps below.
Attendance reports should not be used as official attendance tracking or documentation. Students can join Zoom meetings without signing in to their licensed @law Zoom account so you may not get full names or accurate information on the report. However, if you'd like an idea of who joined, you may pull a report with the directions below.